Insert or Delete Rows or Columns in excel UiPath
A lot of times while designing the business process automation we work with excel automation.
The bot might get input in the form of excel and then you need to set the data well to make it easy for the automation.
Sometimes you might want to insert or delete rows or columns in excel at a specified position to make more sense for the business users.
The main things we usually add are the comments for the particular transaction whether it was processed well or has an error.
This will be the main use of these activities from UiPath.
So, let’s dive into the practical implementation of this:
Insert Rows or Columns:
Step1: Drag and Drop an excel application scope from activities panel to designer panel as shown below:
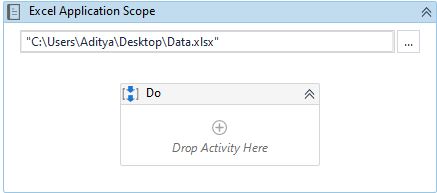
The input excel file looks like below:

Step2: Drag and Drop Insert/Delete Rows Activity and Insert/Delete Columns from activities panel to designer panel inside excel application scope as shown below:
Now we are going to insert two rows starting from the third position and insert two columns starting from the second position.

Let’s look at the required properties for this to happen as expected.

Here:
- NoRows: This indicates the number of rows to be added to excel.
- Position: This indicates from which position it needs to start.
- ChangeMode: Describes whether you want to add or remove.
- SheetName: This is the sheet name of excel where you want to add or remove rows or columns.
The below is the excel after executing this sequence:

Where it added two columns and three rows for existing excel.
Note:
This only inserts or delete rows or columns and not add any values for those rows.
Delete Rows or Columns:
Step1: The whole workflow remains the same but the only change is in the activity property that is shown below:

Here set the ChageMode property to remove.
If the same is executed again after changing property the output looks like below: