How to compress files as a zip file in power automate
While automating a process where you are dealing with a large chunk of files that are provided as input.
Those files need to be stored after processing. So, we will zip those files together to save them in a different folder. (eg: backup folder)
In this article, let’s see how we can compress files as a zip file on a power automate desktop.
Let’s get into the practical implementation of this task:
Step1: Drag and Drop zip files action from actions panel to flow designer panel as shown below:

Let’s look at the required properties for this zip files action:
- Archive path – Provide the full path along with the name of zip file.
Note: If the zip file already exists then it will overwrite that file else it will create a new one.
If you added new files to that folder and want to zip the same folder again then it will overwrite the files that are already present in the zip and adds new files to it.
- File(s) to zip – Provide the folder path which you wanted to zip.
- Compression level – There are several levels of compression that you can choose.
But keep in mind that the higher the compression the smaller the file and also it takes time to create and access.
- Password – If you want to protect this with the password then you provide that here.
- Archive comment – This comment will be added to the zip.
The output value that is produced by this action is the zip file path.
It will provide the zip file name with full path.
The below image shows you all the properties that are used for this example:
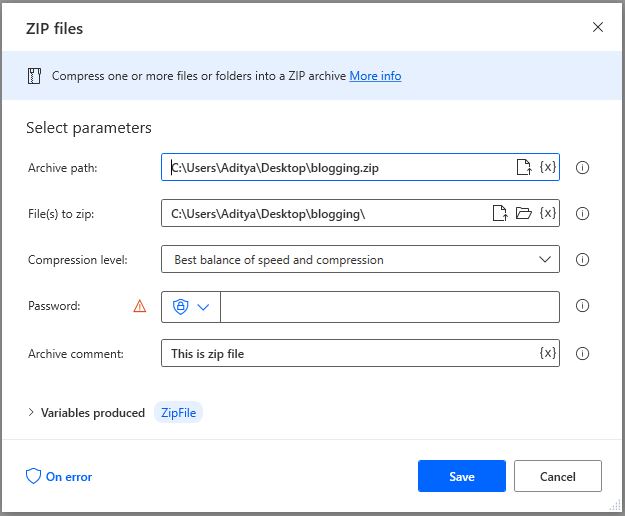
If you write something on Archive comment as shown in the above image then the output looks like below:

This is how we can compress files as zip file using Power automate desktop.