How to insert an image into an excel sheet VBA UiPath
While working with excel automation sometimes we need to insert an image into an excel sheet using UiPath.
Why do we even need to insert an image into an excel sheet?
- This is used as a confirmation step for business users to check wether the intended actions were performed by BOT or not.
- This also helps them identify the issue quicker as if something goes wrong with BOT execution.
- This will also help them with audit purposes in future.
We are going to implement this task using VBA in UiPath.
Let’s get into the practical implementation of this task:
Step1: Drag and Drop an excel application scope activity from the activities panel to the designer panel as shown below:

Step2: Drag and Drop Invoke VBA activity from activities panel to designer panel inside the excel application scope as shown below:

The required parameters for Invoke VBA Activity are shown below:

Here:
- CodeFilePath – Provide the file path where you have the VBA code.
- EntryMethodName – Provide the Method name that is used in the code.
- EntryMethodParameters – If you have any parameters then provie them here (in this example we need to pass image file path).
- OutputValue – Provide a variable that holds the output value of VBA code.
The VBA code to insert an image into an excel sheet is shown below:
Sub InsertImageToExcel(insertFileName)
	  Set myDocument = Worksheets(1)
	  myDocument.Shapes.AddPicture _
 insertFileName, _
 False, True, 0, 0, 770, 370
End Sub
In the above code, it is considering the first excel sheet i.e (Worksheets(1)) to insert the image.
If you want to insert the image in the second sheet of excel then change the number from 1 to 2 i.e (Worksheets(2)).
For the Addpicture method the parameters are mentioned below:
- InsertFileName – We are already passing this in invoke VBA code activity.
- Link to File – If the image has a link then make this to TRUE.
- SaveWithDocument – If you want to save the image with the excel then make it TRUE.
- Left – The position (in points) of the upper left corner of the picture relative to the upper left corner of the excel.
- Top – The position (in points) of the upper left corner of the picture relative to the top of the excel.
- Width – The width of the picture (in points). Enter -1 if you want to retain the width of the existing file.
- Height – The height of the picture (in points). Enter -1 if you want to retain the height of the existing file.
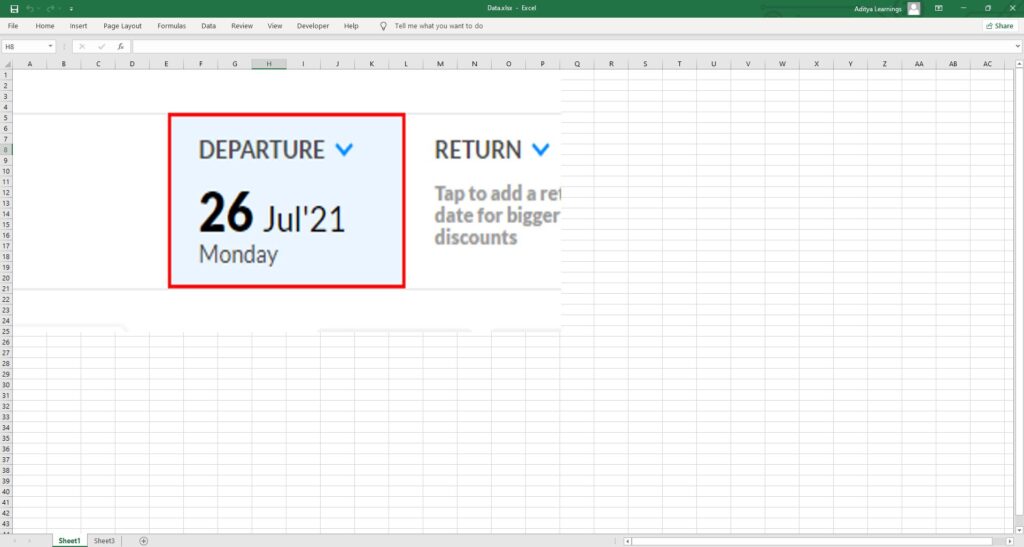
Step4: The output of the above sequence is shown below:
hi, I am getting an error
Excel Application Scope: Invalid path. Please make sure you include the entire URL, including the http/https part.
Hi nithyakala, please make sure the code is correct and if you still face error you can connect with me. check here ways to connect – https://rpalearners.com/about/